The impression phase forms part of many procedures carried out in the dental practice, such as fixed and mobile prostheses, on implants, indirect fillings, but also the creation of individual impression trays, creation of bites and whitening masks, and for use in dental case studies.
The impression material is chosen depending on the purpose for which the impressions are being made and the technique required.
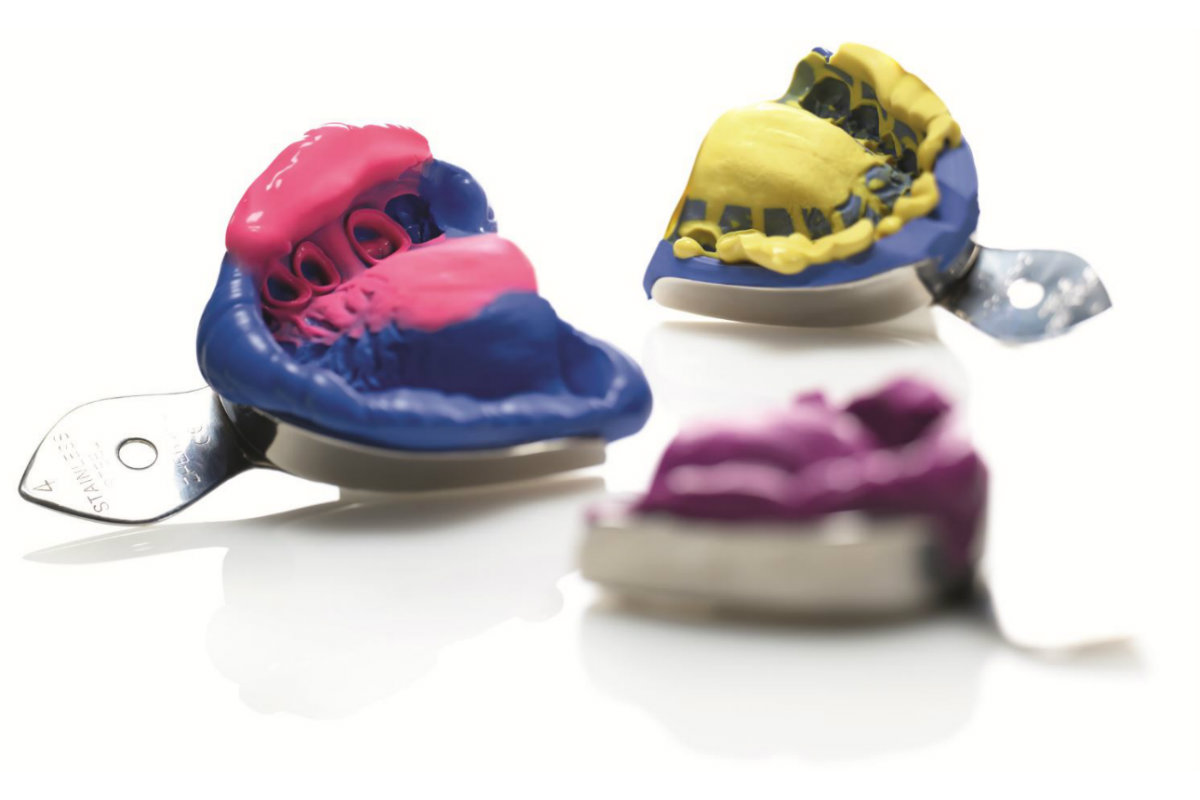
Let us now look at the main impression techniques available to the clinician:
- Alginate impression: normally made using a perforated impression tray to ensure good mechanical retention. Powder and water are mixed in a bowl, in accordance with the manufacturer’s instructions. During this stage, it is important to mix vigorously and uniformly to prevent the formation of lumps and air bubbles in the mixture which would affect the accuracy of the impression.
Once the mixture is the correct density, it is applied to the tray and positioned in the mouth. The material hardens rapidly with minimal discomfort for the patient. Alginate impressions are normally used to create provisional impressions, case studies, and whenever an impression does not require high precision or dimensional stability.
- Precision impressions on natural elements: to obtain an accurate impression, gingival retraction cords (one or two, depending on the technique used) are used to allow an accurate reading of the prepared margins. The impression can then be taken using one of the following techniques:
- One-step technique: after applying the adhesive and allowing it to dry, heavy body PVS or putty is placed on the impression tray, immediately followed by light body material around the dental elements involved in the preparation, ensuring no bubbles are formed. The tray with the higher viscosity material is then inserted into the patient’s mouth until hardened.
- Two-step technique: a preliminary impression is made using heavy body material or putty. When the material has hardened, the impression is removed from the oral cavity and the undercuts are removed. The dentist ensures that the tray containing this first impression can be passively fitted over the arch it was taken from.
They then proceed to apply the light material around the required elements and take the second impression, designed to accurately record the prepared margin.
- Impressions on implants: The purpose of an impression on implant is to record the three-dimensional position of the implant and the transfer, in order to send the correct information to the laboratory making the prosthesis. There are two main impression techniques in this case too, both normally performed using addition silicones:
- Pick-up technique: the transfer in this impression is particularly long so as to exit from the tray and remain embedded in the impression material. This technique requires a standard resin tray, or a custom tray with holes made at the transfer points.
- Closed tray technique: in this type of impression, the transfers remain attached to the implant. Once the material has cured, the impression is removed from the patient’s mouth. The transfer coping is unscrewed from the implant and repositioned inside the impression, ensuring that the correct position is maintained.
Alginate and PVS can also be used to create mobile prostheses. Customised impression trays are normally used for this purpose. This type of tray gives a better adhesion to the soft tissues, minimising the thickness of the material and improving the retention of the prosthesis.
The impression process therefore plays a central role in most dental treatments, and it is vital that clinicians master all necessary techniques and instruments.
Do you want more information on Zhermack Dental products and solutions?
Contact us