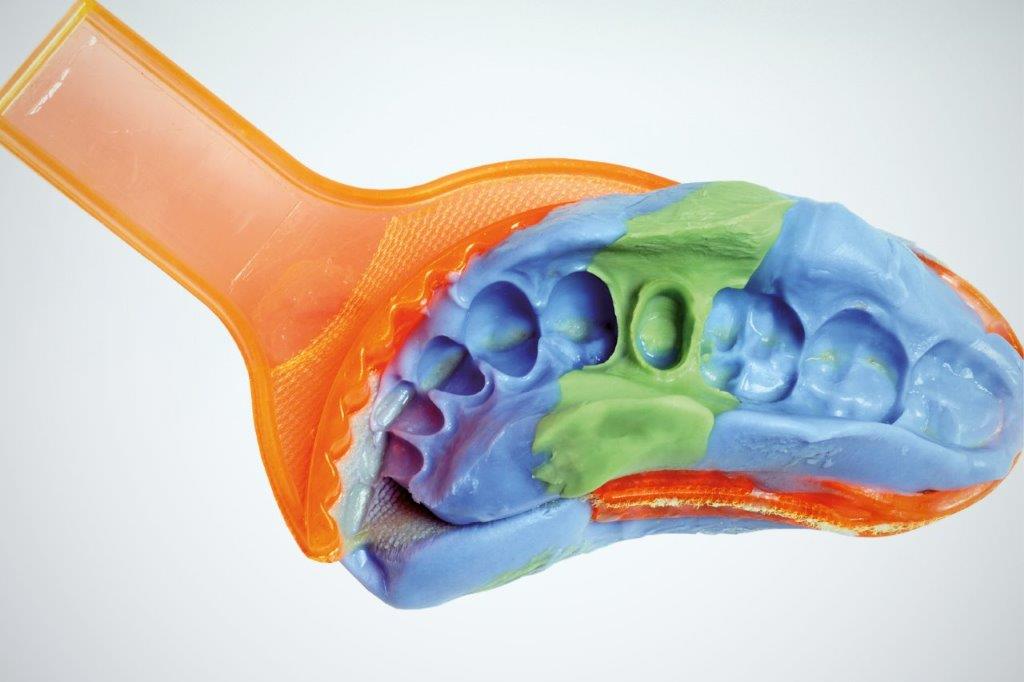
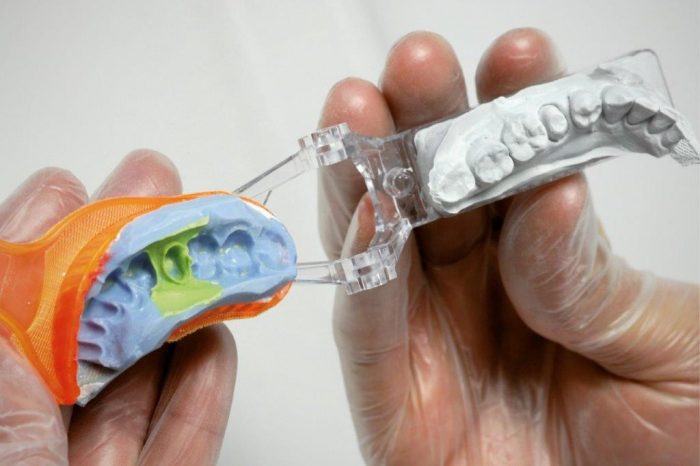
Dual or double arch impression taking is a common technique in dentistry. It uses a special “dual arch” tray to produce an impression of both arches when the patient closes his mouth to maximum intercuspidation [1]. While dual arch impressions reproduce only the side on which the prosthesis is to be fitted, the technique produces simultaneous impressions of the upper and lower semi-arches, along with their articulation.
This saves both time and impression material [2]. On top of this, it has been seen that dual arch impression trays can produce individual crowns of great accuracy, with an average occlusal error in some cases smaller than that achievable with conventional impressions [3].
It is nevertheless more complicated to take a dual arch impression than a conventional one, and the result can easily be spoiled if the impression is not taken in exactly the right way. The main problems are caused not so much by deficiencies in the materials as by technical errors and mistakes in the procedure, or by incorrect assessments of clinical cases [2]. This article looks at the most important factors to bear in mind when taking a dual arch impression.
Indications
Dual arch impressions should only be used to produce individual crowns or partial restorations of the rear teeth (molars or premolars) with healthy adjacent and antagonist teeth and in patients with class 1 occlusion and a stable position at maximum intercuspidation [4]. Longer and more complex prosthetic restorations are difficult to perform using dual arch impressions, since models have to be fitted to unilateral articulators and articulation depends on the stability of only the two opposite semi-arches at maximum intercuspidation.
Impression taking techniques
There are two techniques for taking dual arch impressions: the one-step technique and the two-step technique [2].
One-step technique
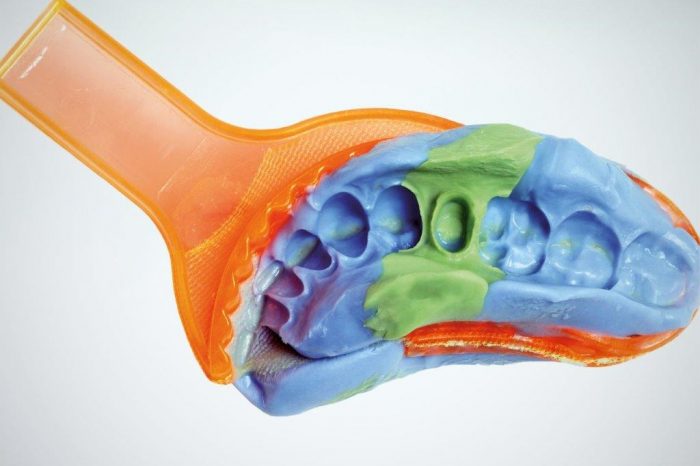
In the one-step technique, the dental practice injects light or medium body impression material around the prepared tooth in a single action while heavy body material is applied to both sides of a dual arch impression tray. This is then placed in the mouth and the patient is asked to bite to maximum intercuspidation [5].
Two-step technique
The two-step technique of dual arch impression taking is less frequently used. In it, the dental practice takes a preliminary impression of the tooth before it is prepared. This impression is then cut away to form a custom tray. In the second step, low or medium body impression material is applied around the prepared tooth and inside the duly shaped first impression. This is applied and the patient asked to close his mouth to maximum intercuspidation until the material hardens [6].
Two-step impression taking is certainly more risky than the one-step procedure, since if the first impression is not correctly formed, the patient’s teeth may not come into perfect contact at maximum intercuspidation and the resulting prosthetic restoration will prove unsatisfactory. Nevertheless, the two-step technique does have its advantages: it permits one or two holes to be made in the vestibular area of the primary impression at the prepared tooth, so that light impression material can be injected around it directly and at a constant, controlled pressure [7].
Choice of impression tray
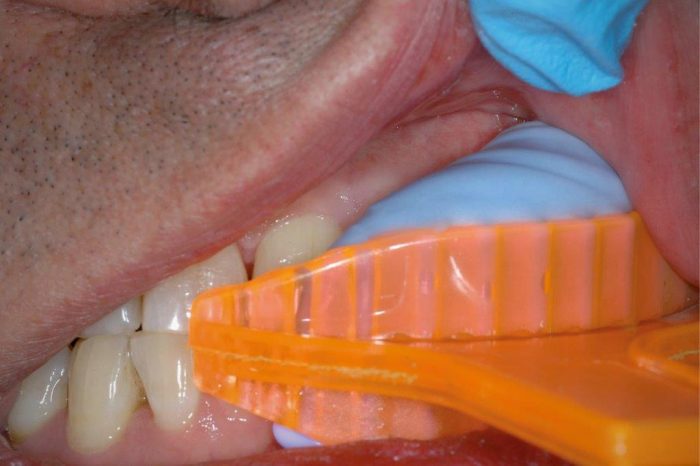
The impression tray must be of the right size and shape for the semi-arches, and should not be pushed away from the alveolar crest by other teeth or anatomic structures [2]. Dual arch impression trays can easily touch the zygomatic crest of the maxillary semi-arch or the retromaxillary zone during occlusion, thus becoming dislodged or distorted during impression taking. These factors must be checked before the impression is taken and the absence of resistance ensured when the patient closes his mouth to maximum intercuspidation. If necessary, the impression tray should be modified to avoid contact with the above mentioned structures. Once the impression has been taken, you can check for possible distortion by making sure that the entire inside surface of the impression tray is covered only by impression material.
Another useful hint when choosing an impression tray is to include the canine tooth on the side of the impression. This is especially helpful when you need to produce posterior crowns that are included in a group guide. The dental technician can use the canine as a guide to ensure a harmonised occlusal pattern during the lateral excursions of the jaw on the working side.
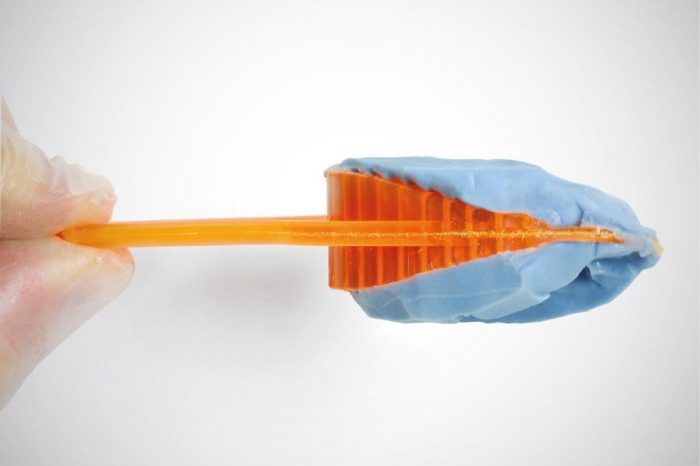
Two types of dual arch impression tray are available: rigid steel trays and flexible plastic ones. Flexible plastic trays, with or without a vestibular border, adapt more easily to the patient’s dental arches and alignment. When this type of tray is used, the impression material also serves the purpose of maintaining the shape and ensuring the stability of the combined tray and impression material. It is therefore best to load flexible impression trays with a more rigid bite registration material to increase their resistance to deformation and provide more adequate support for the impression material [1,2]. Combinations of flexible impression tray and flexible impression material offer limited chance of success. Metal impression trays are generally to be preferred, provided that interference with anatomical features does not prevent their use.
Verification of MI
Verification of MI: When taking dual arch impressions, make absolutely sure that the patient closes his mouth to maximum intercuspidation. If the impression is taken at any position other than MI, the prosthetic restoration will certainly have to be modified if not completely redone at the end of the procedure.
As already stated, the first thing to do is to check for the presence of interference between the impression tray and any anatomic structures. Next, it is essential to ensure that the patient closes his mouth properly during the impression taking. To do so, a piece of articulating paper or shimstock (8 um) should be placed in the other side of the mouth to check that the patient is at MI [1].
Another way of verifying MI in dual arch impression taking is to check that only a thin, translucent film of impression material remains between the antagonist teeth on completion of the preliminary impression. If the occlusal surfaces of the preliminary impression (taken with rigid impression material) are completely opaque, the procedure must be repeated [2].
Remaining with the two step technique, you can also examine the distribution pattern of the light/medium impression material: only the prepared tooth should be completely covered. If light impression material can be seen on the occlusal surfaces of adjacent teeth, but no heavy material, this means that the patient has not reached maximum intercuspidation.
To sum up, dual arch impressions are a valid alternative to conventional impressions, but can only be used successfully in certain clinical cases, with stable, bilateral or unilateral occlusion at MI. Though the aspects described above demand most attention when taking dual arch impressions, aspects related to the choice of materials (e.g. working and setting times) require consideration too: dental practices must pay close attention to these to avoid compromising results. Conventional impressions remain the safest solution if the dentist is not well acquainted with dual arch impressions, if the patient does not have stable occlusion, or if complex prosthetic procedures are involved.
References:
[1] Kaplowitz GJ. Trouble-shooting dual arch impressions. J Am Dent Assoc 1996;127:234–40. https://doi.org/10.14219/jada.archive.1996.0174.
[2] Kaplowitz GJ. Trouble-shooting dual arch impressions II. J Am Dent Assoc 1997;128:1277–81. https://doi.org/10.14219/jada.archive.1997.0405.
[3] Parker MH, Cameron SM, Hughbanks JC, Reid DE. Comparison of occlusal contacts in maximum intercuspation for two impression techniques. J Prosthet Dent 1997;78:255–9. https://doi.org/10.1016/s0022-3913(97)70023-4.
[4] Shillinburg HT, et al. Fundamentals of fixed prosthodontics. Quintessence Publishing Company, 1997 n.d.
[5] Wilson EG, Werrin SR. Double arch impressions for simplified restorative dentistry. J Prosthet Dent 1983;49:198–202. https://doi.org/10.1016/0022-3913(83)90500-0.
[6] Pensler AV. Sense and nonsense about impression materials (II). The impression techniques (combined bite and patient bite). Quintessence Int Dent Dig 1978;9:17–24.
[7] Schoenrock GA. The laminar impression technique. J Prosthet Dent 1989;62:392–5. https://doi.org/10.1016/0022-3913(89)90167-4.
Do you want more information on Zhermack Dental products and solutions?
Contact Us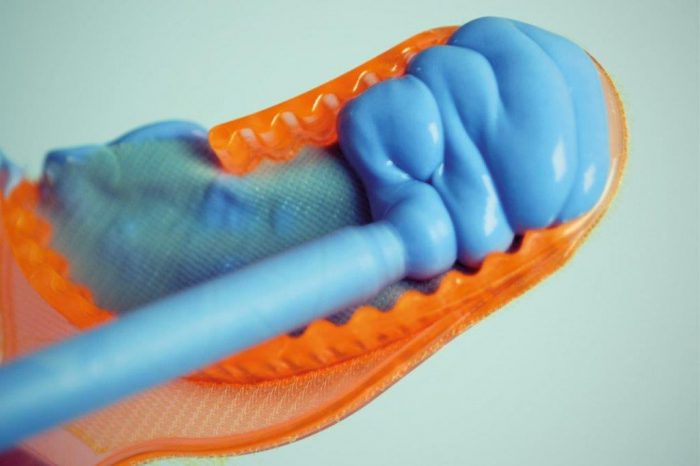

 Zhermack SpA has been one of the most important producers and international distributors of alginates, gypsums and silicone compounds for the dental sector for over 40 years. It has also developed solutions for the industrial and wellbeing sectors.
Zhermack SpA - Via Bovazecchino, 100 - 45021 Badia Polesine (RO), Italy.


