A full removable denture is an extremely complex and unique treatment due to the anatomical and functional diversities that characterise completely edentulous patients (1–3). For this reason, this type of rehabilitation has always been a great challenge for both dentists and dental technicians (4,5).
Although comprehension and the ability to communicate with the patient are essential for the team to be successful (2), the relationship between dentist and dental technician, how they interact and communicate with one another, is also crucial to fabricating a prosthesis that satisfies the patient’s needs and expectations (4,6).
As we saw in detail in the article “Clinical procedures for the fabrication of removable dentures”, the conventional linear technique (7) consists of a total of 9 steps (of which 5 clinical and 4 technical):
- the edentulous patient’s first appointment and taking of preliminary alginate impressions of the arches;
- development of the preliminary gypsum models and fabrication of the custom impression trays;
- functional secondary impressions;
- development of the master models and fabrication of the occlusion rims;
- recording of the centric relation;
- mounting of the models with the occlusion rims on an articulator, choice and assembly of the frontal elements and diatorics;
- aesthetic, phonetic and functional testing and patient consent;
- finishing of the dentures in the laboratory;
- delivery of the denture to the patient following a fit check.
Preliminary gypsum models and custom impression trays
If we analyse the work of the dental technician, the first step consists of fabricating the preliminary gypsum models and making the custom impression trays.
The alginate primary impressions are thus cast using type 3 gypsum and undercut, the models are trimmed and then carefully analysed to confirm that they reproduce the entire surface available for supporting the load of the future prosthesis.
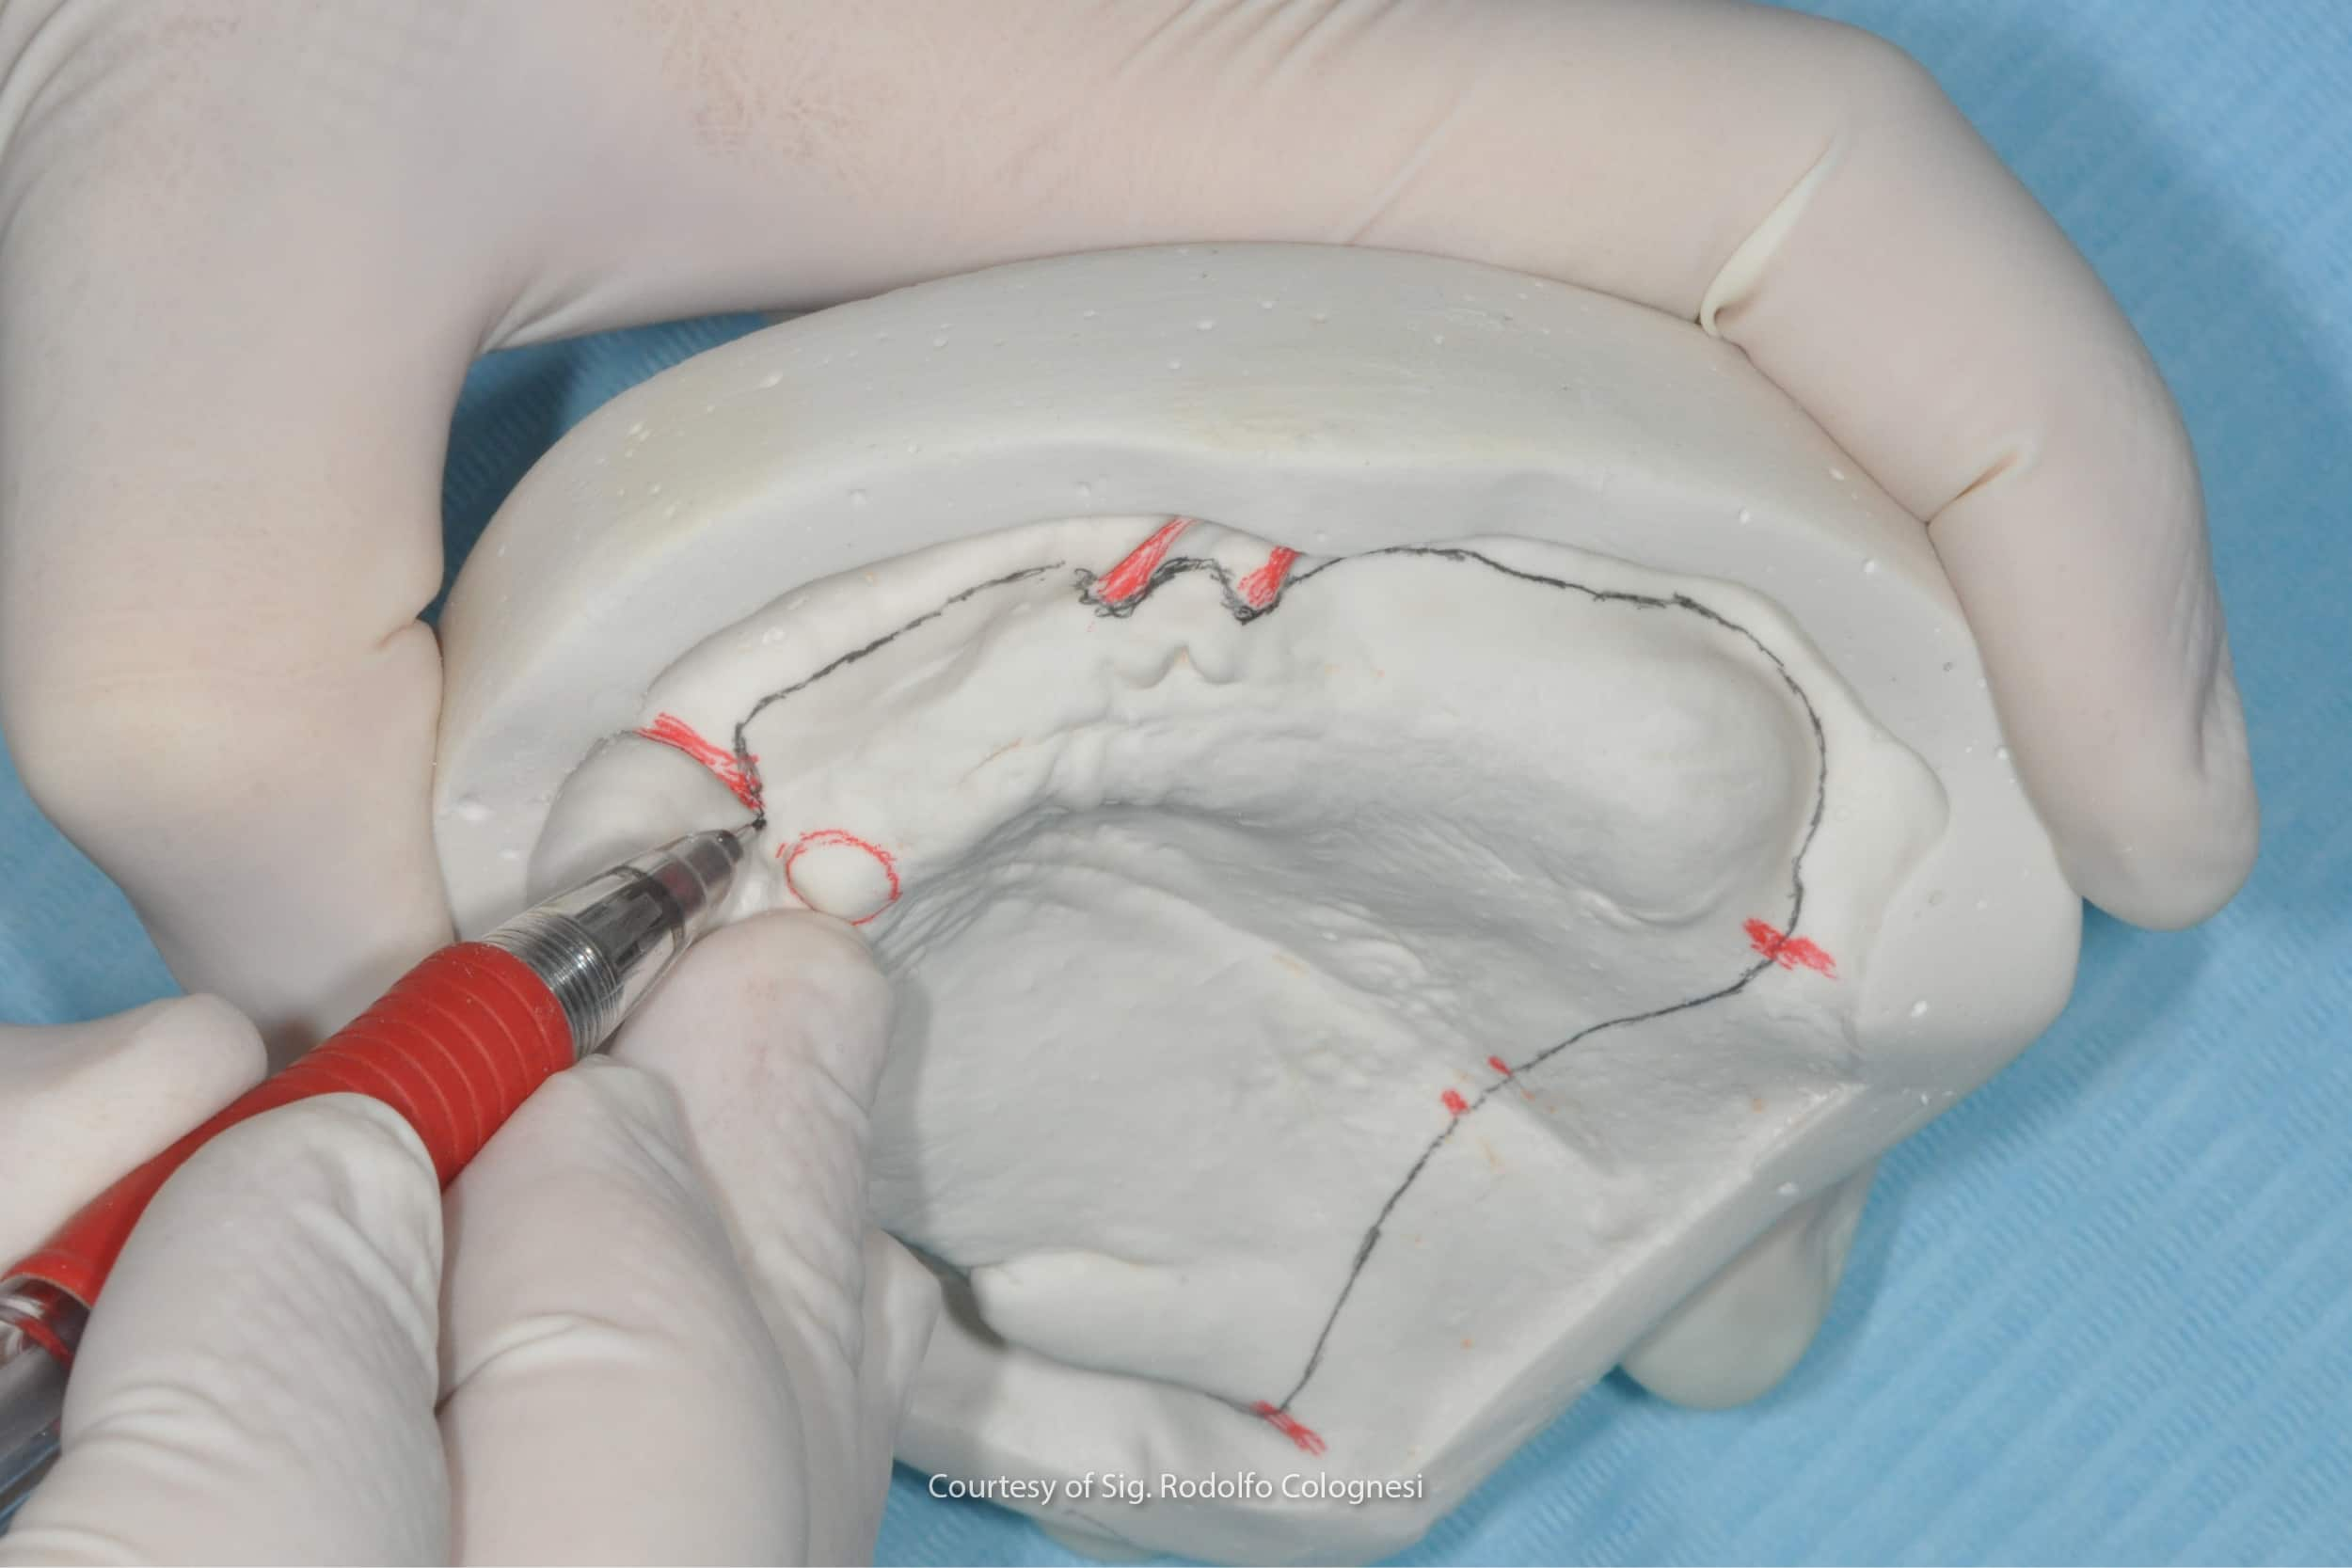
The technician then proceeds with the step of drawing the limits of the custom impression trays on the models, paying careful attention to both the anatomical landmarks and the muscle dynamics present during function (8).
He/she then uses wax to remove the undercut areas, before proceeding with the actual fabrication of the custom impression trays. Depending on the technique and the material the dentist will use for the secondary impression, the dental technician may make impression trays that either fit snugly against the model or that are some distance from it, by applying a sheet of wax to the model (7).
In the latter case, the technician will have to fabricate tissue stops in the impression tray and may also decide in which areas to remove the wax, taking into consideration the pressure to be generated by the custom impression trays on the patient’s tissues.
The fabrication of the impression trays then requires the application of a resin-gypsum insulator on the models, and the spreading and trimming, according to the design on the model, of a sheet or self- of light-curing resin.
The technician will then trim the bases, reducing the thicknesses of the edges of the impression tray in the areas in which he/she deems it necessary, and will apply the handle and the tabs so that they do not interfere with the muscle activity that will be recorded during the final impression step.
Master models, record bases and occlusion rims
The second technical step takes place once the functional impressions have been received. This involves fabricating master models and making the record bases and occlusion rims.
The final impressions are developed by boxing, using wax or other materials, such as an aluminium box and an alginate (9).
The impressions are then cast with type 4 gypsum, extra hard gypsum suitable for casting master models, which are then undercut to bring the base of the models parallel to the occlusal surface of the crests and the models are trimmed, before moving on to the fabrication of the base plates in self-/light-curing resin with wax occlusal rims.
In order to enclose the post-dam area of the future prostheses, the technician may also create a depression in the gypsum, in order to increase the active presence of the seal in that area of the denture, as well as at the peripheral margins.
The technician will therefore trim the soft resin, which is once again self- or light-curing, that will constitute the base of the occlusion rims. Above the bases, the rims are made by rolling a heated wax sheet, to obtain a quadrangular form with a thickness of 6 mm in the anterior sector and 10 mm in the posterior sector (for both arches).
It should be added that the height of the rims from the highest/deepest part of the vestibular flange to the occlusal plane must be 22 mm for the upper arch and 18 mm for the lower arch (7). The occlusal plane of each one must be parallel to the horizontal plane of the base of the undercut model, which is, in turn, parallel to the alveolar ridge.
Remounting the models on the articulator and mounting the teeth on the occlusion rims
Once the occlusion rims have been sent to the dentist and been received back after testing, the models will have to be articulated again with the new vertical dimension and the new clinically-established centric relationship.
Once the models have been mounted on the articulator, the dental technician will mount the teeth on the occlusion rim, starting with the front teeth and following the marks impressed in the rim by the dentist for aesthetic positioning. Here the technician will have to comply with the conventional overbite and overjet relationships between the upper and lower front teeth (10,11).
It will then be important when positioning the diatorics to check that their position and inclination is consistent with the progression of the alveolar ridges, in order to favour the stability of the denture during the dynamic masticatory phase (12,13).
In some cases, as bone resorption in edentulous patients can result in considerable inconsistencies between the maxillary bones, the technician, with the dentist’s agreement, may opt for posterior crossbite mounting. (12,13).
Fabrication of the full denture
Once the clinical assessment of the placement of the teeth has been completed and patient consent has been obtained, the full denture fabrication step can begin.
If an analogue approach is chosen, the conventional techniques consist in the masking of the prosthesis and the hot or cold curing of the pink resin for the prosthetic body (14).
If, on the other hand, digital techniques are to be used in order to avoid curing shrinkage, the technician may decide to scan the base records with the teeth to obtain an STL file and then proceed with the fabrication of the prosthetic bases by milling (15,16).
Conclusions
In short, the design and fabrication of full removable dentures is an intricate process involving close cooperation between the dentist and the dental technician.
The nine steps involved emphasise the importance of both anatomical and functional precision and continuous communication between the professionals. Each step requires meticulous attention to detail and experience often plays a fundamental role in these cases.
Although the use of emerging digital technologies offers new prospects, at the current time analogue approaches are still the gold standard for edentulous patients.
Ultimately, the success of this complex process is based on the skill of and the synergistic cooperation between the dentist and the dental technician in order to provide the patient with an optimum prosthetic solution.
Zhermack offers a variety of high-performance products for the fabrication of gypsum models. The Elite Dental Stones range the Elite Dental Stones range includes gypsums with low expansion for up to 48 hours, conceived to satisfy the diverse requirements of dental technicians for both fixed and removable prosthesis applications.
Thanks to its type 3 and type 4 gypsum options, Elite Dental Stones provides specific solutions for the fabrication of antagonist, diagnostic and master models, thus offering fully-comprehensive support for the various steps of the laboratory process.
References
1. Maniewicz S, Imamura Y, El Osta N, Srinivasan M, Müller F, Chebib N. Fit and retention of complete denture bases: Part I – Conventional versus CAD-CAM methods: A clinical controlled crossover study. The Journal of Prosthetic Dentistry [Internet]. 2022 Sep 15 [cited 2023 Jan 3]; Available from: https://www.sciencedirect.com/science/article/pii/S0022391322004656
2. Friedman N, Landesman HM, Wexler M. The influences of fear, anxiety, and depression on the patient’s adaptive responses to complete dentures. Part I. J Prosthet Dent. 1987 Dec;58(6):687–9.
3. Srinivasan M, Kalberer N, Naharro M, Marchand L, Lee H, Müller F. CAD-CAM milled dentures: The Geneva protocols for digital dentures. The Journal of Prosthetic Dentistry. 2020 Jan 1;123(1):27–37.
4. Al-Ansari A, Tantawi ME. Patient-reported outcomes and efficiency of complete dentures made with simplified methods: A meta-analysis. Dent Med Probl. 2019 Dec;56(4):411–8.
5. Grande F, Tesini F, Pozzan MC, Zamperoli EM, Carossa M, Catapano S. Comparison of the Accuracy between Denture Bases Produced by Subtractive and Additive Manufacturing Methods: A Pilot Study. Prosthesis. 2022 Mar 28;4(2):151–9.
6. Krochak M. The difficult denture patient. Int J Psychosom. 1991;38(1–4):58–62.
7. Moderno Trattato di protesi Mobile Completa [Glauco – Martina Edizioni] [Internet]. [cited 2023 Jan 3]. Available from: https://www.medicalinformation.it/moderno-trattato-di-protesi-mobile-completa-glauco-martina-edizioni-9788875721183glauco-marino-canton-alessandro-marino-antonino-di-lullo-nicola.html
8. Darvell BW, Clark RKF. The physical mechanisms of complete denture retention. Br Dent J. 2000 Sep;189(5):248–52.
9. Bolouri A, Hilger TC, Gowrylok MD. Boxing impressions. J Prosthet Dent. 1975 Jun;33(6):692–5.
10. Pound E, Murrell GA. An introduction to denture simplification. J Prosthet Dent. 1971 Dec;26(6):570–80.
11. Pound E, Murrell GA. An introduction to denture simplification. Phase II. J Prosthet Dent. 1973 Jun;29(6):598–607.
12. Approccio biologico al trattamento del paziente edentulo [Internet]. [cited 2023 Nov 15]. Available from: https://iris.unito.it/handle/2318/24174
13. Goldstein G, Kapadia Y, Campbell S. Complete Denture Occlusion: Best Evidence Consensus Statement. J Prosthodont. 2021 Apr;30(S1):72–7.
14. Abby A, Kumar R, Shibu J, Chakravarthy R. Comparison of the linear dimensional accuracy of denture bases cured the by conventional method and by the new press technique. Indian J Dent Res. 2011;22(2):200–4.
15. Hwang HJ, Lee SJ, Park EJ, Yoon HI. Assessment of the trueness and tissue surface adaptation of CAD-CAM maxillary denture bases manufactured using digital light processing. J Prosthet Dent. 2019 Jan;121(1):110–7.
16. Goodacre CJ, Goodacre BJ, Baba NZ. Should Digital Complete Dentures Be Part of A Contemporary Prosthodontic Education? J Prosthodont. 2021 May;30(S2):163–9.
Do you want more information on Zhermack Dental products and solutions?
Contact us